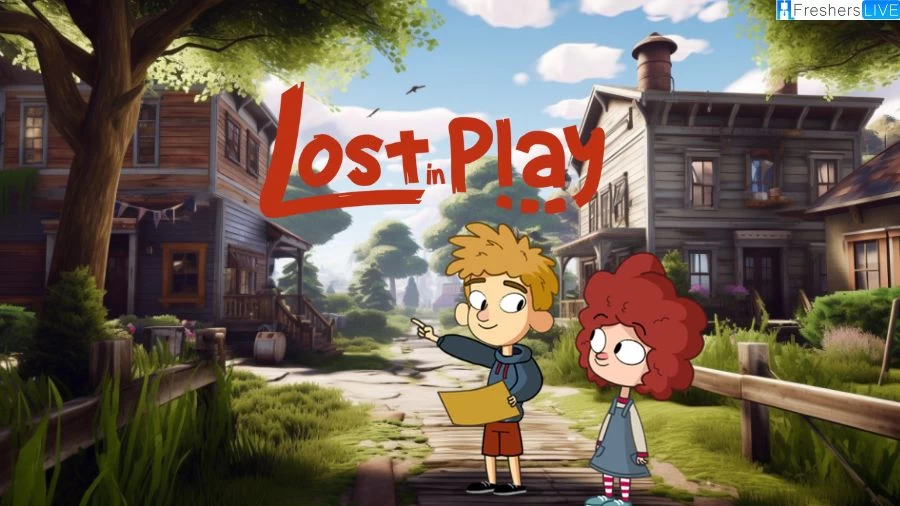
Lost in Play Wiki
Lost in Play is an adventurous indie game developed by Happy Juice Games and published by Joystick Ventures. It falls under the genre of adventure and indie games. The game is part of the Joystick Ventures franchise. Lost in Play was released on August 10, 2022.
- The Prank Panel Season 1 Episode 5 Release Date and Time, Countdown, When is it Coming Out?
- Who are Donna Douglas Parents? Meet Emmett Ratcliff Smith Sr. And Elma Robinson
- Tommy Fury and Molly Mae Baby Name Revealed, What is their Baby Name?
- The Great Indian Rescue Movie Release Date and Time 2023, Countdown, Cast, Trailer, and More!
- If I command the Rivers to Flow Backward, They Shall. Which Champion Says This? LoLdle Quote Answer
The features of “Lost in Play” includes below:
You are watching: Lost in Play Walkthrough, Guide, Gameplay, Wiki
-
Embark on a captivating animated puzzle adventure full of enchanting and extraordinary creatures.
-
Designed with families in mind, allowing children to enjoy watching you play.
-
Communication is entirely visual, ensuring a universal understanding without the need for dialogue.
Lost in Play Walkthrough Guide Gameplay Wiki
Here is the most expected walkthrough of the Lost in Play game.
Chapter One – Introduction
Playing as Gal
We click on the frog and move to the next screen on the right.
As we arrive at the telephone booth, we pick up the receiver and listen to the person on the other end of the line. Moving to the right screen, we pass by a mirror standing alone. Surprisingly, instead of seeing our own reflection, we see the reflection of a bear in the mirror.
Intrigued, we quickly turn back and look into the mirror again, but this time, we see only our own reflection. Continuing to the right, we suddenly notice a floating cup in the air. We click on the left stone, which reveals the stone head of a goblin. By clicking on the stone heads alternately, we are able to take the teacup that appears. We proceed to the right screen.
Reaching a field with three dandelions, we click on the left one, followed by the right one, causing all three flowers to turn turquoise. As a result, a cute monster emerges from the ground, and we gently stroke its face. We continue moving to the left, passing by a locked door that requires a key.
Jumping up, we reach for the letters of the game’s name, but they crumble before our eyes. Soon after, we arrive at a clearing where a royal tea party is taking place. We click on the duckling and the frog wearing a crown. They take out their cups and place them on their saucers. Opening our inventory, we drag our cup downwards while holding the left mouse button.
Upon doing so, the dwarf in the cap takes out a key from his cup. We add the key to our inventory and return to the locked door. Using the key from our inventory, we unlock the door.
To open the door, we encounter a puzzle. By holding the left mouse button pressed, we rotate the circles with bright sun rays to cover the cold blue rays. Once solved, we take the watering can with the image of the moon from the outstretched hand that appeared through the open door. With the watering can in our inventory, we head back to the place of the royal tea party.
We pour moon water into the cups of the attendees and then click on one of the cups. The dream ends, and we find ourselves in our bedroom next to our sleeping brother.
Chapter Two – Waking Up
Bright sunbeams break through the loosely drawn curtains. We click on the blanket to finally wake up. Getting out of bed, we part the curtains to let the sun into the bedroom.
Attempting to wake up our brother, we realize he brushes us off and continues to sleep soundly. We take an alarm clock from the shelf, but to make it work, we need a screwdriver, a battery, and a winding key.
Taking a table lamp, we direct its blinding light towards the burning eyes under the bed. Startled, a cat jumps out, and a battery-powered toy robot falls to the floor.
We pick up the fallen toy and retrieve the battery that fell out of the broken robot. Clicking on the open door of the lower cabinet reveals a clockwork cat on wheels. We manage to slam the closet door shut before the clockwork cat returns to its place.
Automatically, we pick up the dropped key. Clicking on the plywood box under our brother’s bed, we drag it to the left. Aligning ourselves with the arrow on the box, we reach for the screwdriver on the top shelf. Now we need to insert the battery into the alarm clock.
Collected items are automatically combined. Opening the inventory, we take the combined items and apply them to the alarm clock, using the left mouse button pressed.
Using the screwdriver, we unscrew the three bolts from the back cover of the alarm clock. Arrows appear at the bottom left, and by clicking on them, we rotate the battery in the right direction. We then place the battery into its intended slot.
Now, we must assemble the gears into a single moving chain to start the alarm clock. By moving the tiles to the side with the left mouse button, we can put each gear in its proper place. The gears must engage with each other to complete the assembly.
Once the alarm clock is assembled, we use it on our sleeping brother. A short video plays, and we transition to the next room.
Chapter Three – Quite the Scare
We descend the stairs and step over the sleeping dog. From the floor, we pick up colored felt-tip pens. Picking up a comic book, we flip through it until the end by clicking on the right arrow. We create a deer-bear mask using a cardboard box and scare our brother.
Note: If collecting achievements, we need to turn on the radio until the desired achievement appears.
Clicking on the wall-mounted walkers, we realize they lack a pendulum. Entering the room on the right, we notice our brother being engrossed in an electronic toy, oblivious to our presence.
We rummage through the basket with laundry and find a yellow ball at the bottom. Attempting to lure a cat out of a cardboard box with the ball proves unsuccessful. Taking the bell from the bedside table, we use it on the cat, but with no avail.
We nudge our brother’s shoulder and hide behind the back of the sofa, screaming and sticking out our tongue. Our brother moves from his seat, and we find a key, which we add to our inventory.
Returning to the living room, we set the pendulum in place. Examining a family photo up close, we discover that the clock face is set to five o’clock in the afternoon. Accordingly, we move the clock hands to match the time.
Holding the left mouse button, we move the hour hand to 5 o’clock, the minute hand to 12 o’clock, and the second hand to 9 o’clock.
We retrieve the key from the cuckoo that appears and use it to unlock the nightstand drawer. Inside, we find a pair of scissors in an open box.
Heading back to the room with our brother, we open the inventory, take out the box containing the collected items, and place it on the floor behind the sofa. Automatically, we create the desired mask and put it on.
Hiding behind the side of the sofa, we click on our brother. Startled, he runs away, and wearing the mask, we chase after him. We engage in a mini-game where we must click on specific areas while running, following the shadow created by our mask. A counter at the top keeps track, requiring us to step on the designated areas six times.
If we miss a section, the counter resets to zero, and the race begins again. Eventually, we arrive at a new location.
Chapter 4 – Escaping the Bear: Playing as Toto
In the fourth chapter titled “Escaping the Bear,” players take control of Toto, the girl’s brother, who finds himself in a mysterious forest after being frightened. Seeking safety, Toto hides inside a tree hollow as a bear with horns rushes past.
To exit the hollow, double-click on the arrow. Clicking on a reading forest goblin, we are asked to retrieve glasses for him. Next, click on the red button located on a tree trunk. A can opener attached to a thread is lowered, but it hangs too high for us to reach.
Moving to the left screen, we leave a clearing with three frogs. Clicking on a cup, it automatically goes into our inventory. We interact with the frogs and ask how we can help them. The right frog needs a red cap, the left frog requires assistance in opening a can of frog treats, and the central frog struggles to pull a sword out of a stone. Moving to the right screen, we enter a meadow where the bear is located.
We notice a knife and quickly grab it. Unable to contain our joy, we unintentionally attract the attention of the horned bear and run away from the clearing. However, we return immediately and carefully pick up the knife from the ground. Then, we move to the arrival location.
Using the knife, we deepen a crack in a tree trunk where resin drips. Placing the cup beneath it, we collect the wood resin. We proceed to the clearing with the bear.
We place the cup with resin on a stump where a blue moth occasionally lands. A forest goblin attempts to catch the moth without success. As the moth lands on the cup, it gets stuck. The goblin grabs the moth by its paws and flies away from the clearing, freeing a hollow log for us.
We climb through the log to retrieve the glasses. With the glasses in our inventory, we return to the clearing with the reading goblin. We give him the glasses and the goblin disappears in an unknown direction.
Breaking off a branch from a tree, we head to the left screen.
Using the branch as a tool, we remove the cap for the right frog, who becomes our helper.
Returning to the meadow with the bear, we notice a blue lever hidden in the grass near a tree. We enter a hollow log and click on the frog to distract the bear.
While the frog distracts the bear, we attempt to take the lever, but the goblin from the hollow beats us to it.
We ask the goblin to give us the lever, and he agrees only if we win a game of checkers. The goblin moves a black checker, which can move in any direction on the board. We have four white checkers that can only move forward in the direction indicated by the arrows.
Checkers cannot jump over each other or attack. Our goal is to trap the black checker in a position where there is no way out. If we lose, the game restarts. Since it’s a random game, there’s no step-by-step guide available.
Once we obtain the blue lever from the goblin, we push the bear from behind and quickly hide inside a hollow log. The frog stops distracting the bear, who returns to its previous activities. We hurry back to the clearing with the frogs.
We insert the lever into a mechanism’s base and click on it. We observe a button emerging from the ground near the tree.
Approaching the button, we place the helper frog on it. Returning to the clearing, we pull the lever. The frog jumps up, grabbing the can opener attached to a string.
Clicking on the frog, it gives us the can opener. We then return to the left clearing.
We ask the left frog for a closed jar, which we open with the can opener. Clicking on a swarm of flying insects, we watch a short video. Finally, we pull the sword out of the stone.
Clicking on the sword, the frogs gather behind us to assist. Clicking on the sword again, a progress bar appears, representing the team’s efforts. We quickly click on the sword until the bar is filled. With the sword in hand, we proudly walk into the clearing with the bear.
Clicking on the bear, we watch another video. Once we are on the ground, we click on the frogs to distract the bear. Taking advantage of the distraction, we crawl quickly between the bear’s paws and swiftly run to the next location. We find ourselves in caves where we must escape from the bear in five different caves.
The bear and we can only move one position at a time. If the bear spots us, it starts moving toward us. The red stripes represent the bear’s aggression zone, while the yellow stripe is a blind spot where it cannot see us. We can only move to highlighted positions.
Moving alternately to the designated places according to the numbering, we successfully escape from the horned bear. As we run from the last cave, we automatically pick up a figurine that bears a striking resemblance to us. Exiting the cave, we find ourselves in a magical clearing where a king frog is tied to a tree.
Chapter 5 – Catching the Bear
We untie the royal person by pulling the rope. Adding the rope to our inventory, we take note of the magic circle and the symbols surrounding it. Placing the figurine resembling us in the center of the magic circle, we use the rope on the bear tracks near the circle. We notice a niche with a snake image and head toward the cave entrance. The symbols inscribed around the entrance resemble those around the magic circle.
Clicking on the stones alternately, we construct a coherent story from the five drawings on the bag, as narrated by an old woman sitting on a bench. Paying attention to the geometric figure representing each character’s adventure, we click on the geometric shapes on the bag in the correct sequence.
Grateful for our help, the old woman gives us a duckling (1/4). We spot another duckling being waved at us from behind the bushes in exchange for pizza. Clicking on the box, we find a phone number inside to place an order. We take note of the ingredients we want for the pizza, such as mushrooms, tomatoes, and herbs.
Our attention is then drawn to a coin sparkling in a tree’s bark. As we reach for it, pigeons gather around us. Taking bread from our inventory, we crumble it on a plate beneath the tree. While the birds are busy eating, we pick up the coin. We proceed to the telephone booth.
Switching to playing as Gal, we pick up the handset and insert the coin into the coin slot. We dial the phone number 124435, which was written on the pizza box. We provide the ingredients for the pizza: mushrooms, tomatoes, and herbs.
Note: If we select the wrong ingredients and the customer rejects the pizza, we can approach the telephone booth again and dial the desired phone number without inserting a coin.
Chapter 6 – Back Home
Playing as Toto, we place the finished pizza in an empty box near the bushes and retrieve the duckling (2/4). Approaching the garden gnomes, we notice that their colored hats correspond to the multi-colored roofs of houses. Clicking on the gnomes, we align their heights to match the houses. We retrieve the duckling (3/4).
Switching back to playing as Gal, we approach a trash can and attempt to find something useful inside. However, the unpleasant smell prevents us from doing so. We move to the left screen.
Clicking on an urn with legs, a bespectacled fairy wizard jumps out and offers us a simple clothespin. We return to the trash can near the telephone booth.
Using the clothespin on the trash can, we rummage through it and search for the last duckling (4/4). Playing as Toto, we show the collected ducklings to the goblin-aeronaut. As a result, the aeronaut presents us with a puzzle involving the ducklings.
See more : Manisha Rani Height How Tall is Manisha Rani?
The objective is to move the flag and return all the ducklings to the starting line. Each duckling starts with 100 units of energy, and swimming one position consumes 25 units of energy. The ducklings can share energy with each other using the up arrow. Clicking on a duckling reveals directional arrows, and we choose one of the possible options.
First, we push all the ducklings to the first position. Duckling #2 moves to the second position. Duck #4 shares energy with Duck #3 using the up arrow.
Duck #3 then shares energy with Duck #2, and Duck #2 swims to the flag, grabbing it.
With the flag in its beak, Duck #2 swims to Duck #3, which shares energy with it.
Duck #2 swims back to Duck #1, who shares energy with it. Both ducklings return to the starting line.
Duck #3 swims to Duck #4, who shares energy with it. Both ducklings safely return to the starting line. Puzzle solved. We show the victorious flag to the disgruntled goblin-aeronaut and watch a video.
During the flight, we pull out a white feather from the left wing of the heron. Using this feather, we tickle the heels of the aeronaut.
A scale appears on the right, and we need to keep the ball within the green zone until the circle below is completely filled with green.
Switching back to playing as Gal, after filling the tickle scale, we pull the parachute ring. A green goblin-aeronaut flies on a parachute into the distance.
A new scale with a slider appears on the right. To leave the heron, we need to swing as much as possible while holding onto the bird’s legs. Holding the left mouse button, we move the slider up and down until the scale at the bottom is completely filled with green. We then release the heron’s legs and descend to a sailboat in the open sea.
Chapter 7 – Whale Sighting
After watching a short video, we receive a map of the journey home from the fairy wizard. We swim to the right screen. Playing as Toto, we swim to an island with two palm trees, where a treasure chest is located. Double-clicking on the chest, a massive whale emerges from the sea and swallows us whole without hesitation.
Playing as Gal, we express our indignation to the sea monster and demand the immediate release of our brother. We swim to the left screen. Approaching two captains, we share our problem with them. A pirate seagull requests a fish in exchange for its assistance. We continue sailing to the left screen.
We ask a fish for a breathing tube from scuba gear, and we obtain it. Returning to the fish that swallowed our brother, we use the breathing tube on ourselves and dive into the water. We notice corals and fish trapped under the whale’s belly.
Switching to playing as Toto, we click three times on a crab carrying a wine cork on its back, driving it into a hole. We retrieve the cork from the crab and swim up to the coral reef. Using the cork, we seal one of the outlets from the whale’s esophagus where a movable red light is hidden. Clicking on the clamshell where the light was hiding, we add it to our inventory. We then descend to the bottom.
Placing the glowing red light on a lamp plant to the left, a crab with a shell rushes into the column of light. Clicking on the sink, we retrieve it and swim back to the sleeping monster.
Using the shell as a mouthpiece, we awaken the sleeping monster and ask for the fluffy process on its head. The three-eyed whale agrees to share the process if we solve a few logic puzzles to prove our wit.
In the first puzzle, we arrange the jellyfish in the correct order based on their points on the body. We order them in ascending order. Refer to the screenshot for the correct solution. In the second puzzle, we arrange the jellyfish in the correct order according to the phases of the moon, from new moon to full moon. The finished solution can be seen in the screenshot.
In the third puzzle, we arrange the jellyfish in the correct order. In the left row, we arrange them vertically from bottom to top, increasing the number of stripes. In the right row, we arrange them horizontally from top to bottom, decreasing the number of stripes. The central row combines the left and right rows, arranged in ascending order from bottom to top. Refer to the screenshot for the correct solution.
In the fourth puzzle, we arrange the jellyfish in pairs, creating a mirror image. The solution can be seen in the screenshot.
With our intelligence and quick wit proven, the whale fish gives us its fluffy process, and we proceed to the whale.
Using the fluffy process on the whale spits out our fishing neighbor and us. The whale sinks to the sea bottom, allowing us to continue our journey home. We watch a video.
Chapter 8 – Saving Your Brother
Playing as Toto, we retrieve the fluffy process from the inventory and start tickling the protruding part of the whale’s tongue-shaped esophagus. This action awakens the angry whale, who spits out our fishing neighbor and us. The whalefish sinks to the bottom of the sea, enabling us to continue our journey home. We watch a video.
Playing as Gal, we join our brother and embark on a floating bathyscaphe. We dive into the water and swim toward the sleeping monster. Despite our attempts to wake it up, the monster remains undisturbed. We descend to the ocean floor.
Clicking three times on a crab carrying a wine cork on its back, we drive it into a hole. Retrieving the cork, we ascend to the coral reef.
Using the cork, we seal one of the inlets from the whale’s esophagus, where a movable red light is hidden. Clicking on the clamshell that concealed the light, we add it to our inventory. Descending to the ocean floor once again, we place the glowing red light on a lamp plant located to the left. This attracts a crab with a shell to rush into the column of light. Clicking on the sink, we add it to our inventory and swim back to the sleeping monster.
Using the shell as a mouthpiece, we awaken the sleeping monster. We ask the monster for the fluffy process on its head, and it agrees to share it with us on the condition that we solve a few logic puzzles.
In the first puzzle, we need to arrange the jellyfish in the correct order based on the number of points on their bodies. We arrange them in ascending order, starting with the jellyfish with the fewest points.
In the second puzzle, we arrange the jellyfish in the correct order according to the phases of the moon, from new moon to full moon.
In the third puzzle, we arrange the jellyfish in the correct order based on the number and orientation of the stripes. The left row shows the jellyfish arranged vertically from bottom to top, with an increasing number of stripes. The right row displays the jellyfish arranged horizontally from top to bottom, with a decreasing number of stripes. The middle row combines the stripes from the left and right rows in ascending order from bottom to top.
In the fourth puzzle, we arrange the jellyfish in pairs to create a mirror image.
With our wit proven, the whale fish gives us its fluffy process. We swim back to the whale.
Playing as Toto, we give the fisherman the electrified bait. In return, the fisherman gives us his hat, shaped like a plunger.
The fisherman also gives us a caught fish. We use the plunger on the toilet and retrieve a key from it. Through the hole in the whale’s belly, we push out the key and the caught fish. We then switch back to playing as Gal.
Using the key we obtained from Toto, we open the chest in the whale and retrieve a navigation device. This device triggers another mini-game.
Controlling the bathyscaphe, we click on the tips of the red crosses on the left to guide it. Pressing the left mouse button and moving the slider up, we navigate the bathyscaphe through the stone blockage.
We repeat this process twice, guiding the bathyscaphe through the stone blockages to the left.
We then turn the bathyscaphe around and navigate it through the blockage to the right.
Moving the stone barrier to the left, we guide the bathyscaphe up and move through the free passage. We continue guiding the bathyscaphe up through the stone rubble.
Directing the bathyscaphe to the right, we lead it through the free passage according to the antenna signals.
Chapter 9 – Journey Home
Playing as Toto, we enter the floating bathyscaphe and descend into the water. We swim to the sleeping monster, trying to wake it up without success. We dive to the ocean floor. Clicking three times on the crab carrying a wine cork on its back, we drive it into a hole. Retrieving the cork, we swim up to the coral reef.
Using the cork, we seal one of the outlets from the whale’s esophagus where a movable red light is hidden. We collect the light, which is actually a small fish, and add it to our inventory. We then dive back to the ocean floor. Placing the red light on the lamp plant to the left, a crab rushes into the light. Clicking on the clamshell, we retrieve it and ascend to the surface.
We use the clamshell as a trumpet to awaken the sleeping monster. The monster agrees to give us a process from its head, but only if we prove our wit by solving a series of logic puzzles.
In the first puzzle, we arrange the jellyfish in ascending order based on the number of points on their bodies. In the second puzzle, we arrange the jellyfish in the correct order based on the phases of the moon. In the third puzzle, we arrange the jellyfish by the number and orientation of their stripes, following a specific pattern. In the fourth puzzle, we arrange the jellyfish in pairs to create a mirror image.
With our intelligence proven, the monster gives us its fluffy process, allowing us to proceed. We swim back to the whale. Playing as Gal, we retrieve the fluffy process from Toto and tickle the protruding part of the whale’s tongue-shaped esophagus. This action awakens the whale, and it spits out our fishing neighbor and us. The whale sinks to the bottom of the sea, allowing us to continue our journey home. We watch a video.
Playing as Toto, we retrieve the fluffy process from the whale and reunite with Gal. Together, we set off on our journey home. We navigate through the open sea using the navigation device obtained earlier.
Following the map provided by the fairy wizard, we encounter various obstacles and challenges along the way. We overcome them using our wit and problem-solving skills. We watch a series of events unfold through a combination of puzzles, interactions with characters, and strategic decision-making.
Throughout our journey, we encounter friendly creatures, solve puzzles, collect items, and explore different environments. The challenges we face test our courage, intelligence, and teamwork. We encounter sea monsters, navigate treacherous waters, and overcome obstacles to reach our ultimate goal of returning home.
As we progress through the journey, we witness breathtaking sights, engage in thrilling adventures, and experience moments of triumph and excitement. We develop a deeper bond with each other and gain valuable insights into the power of friendship and perseverance.
Finally, after a series of exhilarating escapades, we successfully reach our destination — our home. We are greeted by our loved ones, who celebrate our safe return. We reflect on the incredible journey we undertook and cherish the memories we made along the way.
As the story concludes, we are reminded of the resilience and determination that guided us through the challenges we faced. We learn that with courage, resourcefulness, and the support of those we care about, we can overcome any obstacle and achieve our goals.
The adventure ends, but the lessons and experiences gained from it stay with us forever. We carry the memories of our extraordinary journey, forever changed by the remarkable bond we forged and the incredible feats we accomplished together.
Note: The above continuation is a fictional extension based on the provided context. It follows the general structure and themes of an adventurous journey, but specific details and events may vary depending on the original narrative.
Chapter Ten – Dragon Flight
In Chapter Ten, titled “Flight on the Dragon,” we take control of the game character Toto. Using the cursor key “right” on the keyboard, we initiate a leisurely flight on a dragon. Holding down the right arrow key allows us to fly faster, enhancing the exhilaration of the journey.
During our flight, we encounter a fairy wizard who warns us to protect a crown that will help us pass through guarded gates and find our way home. However, as our flight progresses, an argument ensues, leading to a catastrophic event and a sudden fall from a great height. To witness the events unfolding, we are prompted to watch a video.
Chapter Eleven – Rescuing Our Sister
When we regain consciousness, we find ourselves in an unfamiliar location. We stand up and assess our surroundings, immediately questioning the whereabouts of our sister. A periscope-like eyepiece catches our attention, and we decide to look through it.
Peering through the periscope, we gaze into the window of a towering structure and spot our sister trapped behind bars. Lowering our view, we notice a goblin aeronaut wearing the crown that we were tasked to protect. Further down, we spot a guard diligently watering the flowers near the window.
Above the entrance, we observe a vigilant bird perched on the window, poised to sound the alarm at the slightest hint of danger. Additionally, an armed guard stands before the passage, blocking our way. We relay all this information to our potential saviors. After a brief consultation, they propose a comprehensive plan to rescue our sister.
The first step of the plan involves acquiring a cart loaded with vegetables while neutralizing the first guard to proceed through the passage and reach the tower. To execute the grand plan, we must locate a cart, a chicken, and a flower. Before we depart, a piece of paper with a password is handed to us. We turn the doorknob, open the door, and step outside, only to discover that we have arrived on flying islands.
Our initial attempt to catch a walking chicken proves unsuccessful as it skillfully evades our grasp. We then proceed to knock on an attic window, where we are asked to provide the correct password. However, we intentionally provide the wrong password three times, frustrating the questioner.
With each incorrect response, a deer head nailed above the attic window gradually lowers closer to the ground. Eventually, it falls off, and we collect the deer head to add to our inventory.
As we explore further, we reach a fountain and find a coin hidden within its water. We approach a street musician and request a performance. Notably, mournful sounds attract a lamb from the foliage, expressing its dislike for such music. Continuing to the right, we move to the next island, where our attempt to catch the chicken once again proves fruitless as it swiftly eludes us and runs to a neighboring island.
Engaging in a conversation with a goblin who tends to his garden, we request the use of a cart. However, the farmer refuses due to his frustration with the birds that spoil his crops. In a twist of events, we open a nearby toilet door and find instructions for creating scarecrows tailored to different types of birds. Flipping through the pages, we locate the specific scarecrow design we require, featuring a deer head and a black T-shirt adorned with a red cross on the chest.
Moving to another island, we encounter a shepherdess who laments the loss of two lambs. Notably, to extract soda with syrup from a barrel, we need to find a valve for the tap. As we observe a group of card players, one of them eventually leaves the game after losing.
Approaching the owner of the outlet, we request a bottle of soda with syrup, but our request is denied. Engaging in conversation with the players, we learn that ten coins are required to participate in their game. Meanwhile, the elusive chicken flies to the roof of the outlet.
See more : Alan Wake Walkthrough Gameplay Guide Wiki
We notice a second lamb on the neighboring island, but the bridge connecting the islands is broken. Therefore, we must devise a plan to ensure the lamb jumps over to our island. We proceed to the left screen until we reach a former player who has taken up fishing as a new hobby. The player asks us to find a magnet for him.
Notably, we spot a bird’s head within the crown of a tree and click on it, revealing the presence of our familiar fairy wizard hiding there. We inform the fairy wizard about our sister being imprisoned, and in return, we receive a bird’s head mask for future use. Subsequently, we head towards the island where the lambs are located.
Before ascending the tree, we wear the bird mask on the scarecrow’s base. Surprisingly, the sentinel raven allows us to climb the tree. Moving along the trunk, we dismantle the crane’s valve on the right side. Ascending further, we encounter a magnet that is just out of our reach. Along the way, we memorize the symbols depicted on suspended geometric figures or similar objects.
Upon reaching the top of the tree, we request a flower from the raven-teacher. The raven agrees to provide us with a flower but challenges us to prove our wit. The crows line up vertically, each holding geometric figures with specific drawings in their beaks.
We are tasked with selecting the correct images that we encountered on our way up the tree. By clicking on the figures and choosing the appropriate images, we successfully obtain a flower from the raven.
Descending the trunk, we approach a barrel and use the valve we acquired to open the tap. Subsequently, we observe how a lamb rushes to the spilled puddle of carbonated syrup and indulges in its flavors. As a result, the lamb emits multi-colored gas and flies over our heads. Meanwhile, the outlet owner scolds the lamb, providing us with an opportunity to collect a bottle of soda from the counter.
We throw the bottle of soda to a lamb on a neighboring island. After the lamb licks the delicacy, it flies to our island and reunites with the shepherdess. As we observe the posters plastered on the wall of the outlet, we take a closer look at them.
Removing two posters from the top, we uncover a musical work by a renowned rock band. We add this poster to our inventory. Returning to the street musician, we present the rock band’s poster, causing a transformation in the musician’s music selection. Consequently, the lamb descends from the tree and begins singing along. Clicking on the lamb, we inform it that the shepherd is waiting, and together we proceed to the shepherd’s island.
We retrieve the shepherd’s staff from the ground and approach the shepherdess, informing her about the clever chicken and seeking her assistance in catching it. Automatically, we climb the pyramid of lambs and make an attempt to grab the chicken. After a short while, we succeed in catching it.
Equipping ourselves with the raven mask, we climb the tree trunk, retrieve the magnet from a branch, and descend back down. Proceeding to the fisherman, we offer him the magnet, witnessing how he retrieves a multitude of coins from below before returning to the gaming table.
We collect a dropped coin and acquire a magnetic fishing rod. Our task now is to load the trolley with scrap metal using the fishing rod, aiming to stop the arrow within the green zone. Once the scrap metal is recycled, a coin appears to the right of the recycling mechanism.
Using the magnetic fishing rod, we carefully direct it to the right or left and up or down using the cursor keys. Pressing the “Z” key allows the magnet to pick up a metal structure, and releasing the key makes the item fall down.
We pick up a coin with the magnet and move it to the right, combining it with other coins. With the magnet, we lift all the collected coins and lower them into the barrel on the right. Once all the coins are in the barrel, we lift up the accumulated coins.
Moving to the right, we come across two more coins along the way. Finally, we find the last coin at the location with the players. With our collection of coins, we approach the game table and show them to place our bets.
We familiarize ourselves with the rules of the game: each player starts with 10 coins, and bets are made in turns. To win, our bet must be higher than the highest bet made by our opponents, and it should not be the same as any other bet. The player who wagers the most coins emerges as the winner. The goal is to accumulate at least 30 points, and we should avoid spending coins on low-value cards since the points are indicated on each card.
To skip a turn, we click on the cross on our coin. Using the arrows on the coin, we select the bet amount, and after choosing our desired bet, we click on the center of the coin with the assigned amount. We carefully assess the number of coins each opponent has and whether they can match or surpass our bet.
If our bet is successful, it is marked with a green checkmark, and the scoring is automatically calculated for all players. In case of a loss, there’s no need to search for coins again; we simply click on the game table to continue.
After winning the game, we pick up a Chupa-Chups candy from the ground and proceed to the location with the fountain.
Clicking on the laundrywoman’s underwear, we quickly step aside as she turns her back to us, revealing a baby tied to her back. Attempting to remove the black T-shirt, we face resistance from the baby, who throws a tantrum. However, when we take off the underwear again, we offer the baby a candy to keep it from raising the alarm while we remove the T-shirt from the rope. We then return to the garden location.
First, we place the T-shirt on the scarecrow’s base and attach the deer’s head. The monstrous appearance of the scarecrow frightens away not only the birds but also the farmer himself, allowing us to retrieve a cart loaded with greens.
Clicking on the stairs down, we inform the conspirators that everything is ready to implement the plan, and we proceed to watch the video.
Chapter Twelve – Saving the Prisoners
In Chapter Twelve, titled “Save the Prisoners,” we find ourselves in a prison cell. To initiate our escape, we click alternately on the glowing eyes in the dark. As a result, the lamp topples over and illuminates the prison cell, revealing the presence of the conspirators and our captured sister.
To free our sister, we must click first on the right conspirator and then on the left, causing the fire to burn through the rope on which our sister, who is transformed into a fighting chicken, is hanging.
As the fighting chicken, we navigate through the bars of the lattice and move into the common prison cell. We briefly investigate a “duck” where prisoners relieve themselves and then proceed to the next room, where a guard engrossed in reading a book is stationed.
Swiftly, we crawl under the table and pull the rope of a fan, causing the fan cover to open and revealing a spider that had been spinning the fan blades. Following the spider, we return to the common cell and click on it. In return, the spider brings us a sleepy flower, which we hide in our inventory.
Feeling drowsy ourselves, we fall asleep. To revive the chicken, we click the mouse, bringing it back to life. We then venture into the security room, where we use the sleepy flower on the guard, causing him to fall asleep.
With the guard unconscious, we take the tongs from the table and pick up a book of fairy tales from the floor. We proceed to our solitary cell, where we utilize the tongs to extract a nail from the wall. Offering the nail to Toto, our character’s sibling, allows them to open their shackles. We then watch a short video.
Returning to the security room, we aim to open the grate. By jumping on the table, we peck on the plaque to release the belts holding the grate. We carefully examine the hint on the guard’s chest, revealing a puzzle. We observe a crown above the magnet, a crescent moon to the right of the crown, and a house image to the left.
Following the order indicated on the guard’s chest, we click on the cells accordingly. As a result, the lattice of the common cell rises, providing an escape route for the prisoners.
Everyone exits into the sleeping guard’s room, where we discover that there are no keys to unlock the door. Undeterred, we fearlessly stick our head into the air duct grille, remove it, and uncover a clear escape route.
Chapter Thirteen – Reading a Story
In Chapter Thirteen, titled “Reading a Story,” we engage in a unique experience as Gal, another character in the game, reads a tale of how a princess rescues her prince imprisoned in a tower. The book’s pages serve as temporary portals, allowing us to travel between the Past (-50), Present (0), and Future (+50). To navigate through time, we move along the arrows on the edges of the book.
The journey begins in the Past, where we acquire the good gate and place it in position. Transitioning to the Present, we request the prince to throw us a plant in a flower pot, which we place in the well bucket. Returning to the Past, we twist the gate handle and retrieve the plant from the bucket, subsequently planting it in the ground.
Transitioning to the Future, we find that the grown tree has depleted all the water in the moat. We descend into the moat, take an egg, and place it in the bucket. Returning to the Present, we retrieve the egg from the bucket and give it to a bird for incubation.
Moving to the Future once again, we collect the turtle that hatched from the egg. The turtle requests that we fill the moat with water. Returning to the Past, we dig up the plant from the ground. Transitioning to the Future, we take the turtle out of the water and place it in the well bucket. Back in the Past, we remove the turtle from the bucket and return it to the water.
In the Future, we move to the other side of the moat by riding on the back of the grown turtle. From there, we ascend to the prince using his regrown beard. A video showcases this climactic moment.
Chapter Fourteen – Catching a Frog
In Chapter Fourteen, titled “Catch a Frog,” we control both Toto and Gal as their long journey culminates at a portal guarded by two frogs. Time is running out, but we manage to arrive just in time. Attempting to place the crown on the top of the
portal, we realize that our small stature prevents us from reaching it. We hear the sounds emitted by the frog behind the portal and quickly approach it.
Clicking on the frog, we come up with an idea to use it to place the crown in its proper position. We try putting the crown on the frog, but it clearly dislikes the idea and escapes to the platform in front of the portal. Determined, we follow the frog and click on it.
Now, we find ourselves in a game where our objective is to guide the frog into a cage. By moving only one cell at a time, we must strategically position the frog to reach the cage. The frog can jump two squares in any direction. It’s important to note that the puzzle is randomized, so the solution presented here is just one possible winning combination.
- Our moves: B2 and G7.
- Our moves: G6 and D6.
- Our moves: G6 and B3.
- Our moves: G5 and D5.
- Our move: D4.
At this point, we click on Gal, allowing her to grab the frog. A video sequence follows, showcasing our success in capturing the frog.
Chapter Fifteen – Return Home
In Chapter Fifteen, titled “Come Back Home,” we find ourselves in the interworld, where Toto and Gal have merged together. We retrieve a bottle from our inventory, uncork it, and release a fairy magician with an ultraviolet glow. Additionally, we find a coin hidden within the hollow of a tree.
Approaching the fairy magician, we request a watering can. The fairy is willing to exchange the watering can for three cups. Thus, our quest begins to find these cups. Examining a family photo, we take note of the positions of the multicolored objects depicted. We then ascend to the clock clocks, aligning the multicolored arrows to match those in the family picture. This grants us the first cup.
Discovering a book, we use the fairy magician’s ultraviolet light to highlight the drawings within it. We take note of the number three near the steering wheel. As we explore further, we find that the card indicates number one, while the handbag reveals number two.
Using our clicking action, we manipulate the characters beneath the belly of a massive whale, drawing connections to objects mentioned in the book. We associate these objects with various characters, such as a gambler, an old woman with pigeons, and Baba Yaga. This enables us to obtain the second cup.
Next, we toss a coin into a payphone, resulting in a pizza delivery that brings us the third cup. With all three cups in hand, we offer them to the fairy magician in exchange for a watering can adorned with a crescent symbol. We use the watering can on the door, causing it to transform. Stepping outside, we move to the right and retrieve the crown.
Returning to the royal person, we hand over the crown to them. A final video is then shown, allowing us to witness the true games played by the brother and sister. We continue watching until the subtitles reach the end.
TRENDING
Lost in Play Gameplay
Lost in Play is an immersive adventure that delves into the world of childhood imagination, offering a captivating journey filled with puzzles and vibrant characters. Players assume the roles of a brother and sister duo who find themselves lost and must navigate through a series of imaginative landscapes in order to find their way back home.
Throughout the game, the siblings encounter a blend of reality and fantasy, embarking on various escapades such as exploring an enchanted forest inhabited by a horned beast, inciting a rebellion within a goblin village, and assisting a group of frogs in their quest to free a sword from a stone.
The game presents players with a diverse range of puzzles and mysteries to unravel, each one carefully designed to challenge their problem-solving skills. These puzzles take the form of mini-games and unique challenges, such as engaging in a clicking contest with a pirate seagull, serving magical tea to a royal toad, and gathering components to construct a flying machine.
By embracing curiosity and solving these puzzles, players unveil the next pieces of the captivating storyline. One of the standout features of “Lost in Play” is its ability to bring the power of imagination to life.
Starting from seemingly ordinary settings like home and the park, the game quickly propels players into a whirlwind quest, where they infiltrate a goblin castle, explore ancient ruins, and even take flight atop a colossal stork. This nostalgic roller-coaster ride evokes a sense of wonder and nostalgia.
Presented in an interactive cartoon-like style reminiscent of animated shows from childhood, “Lost in Play” is a story that appeals to players of all ages. Whether seeking delightful and wholesome entertainment or simply aiming to have a great time, families can come together and enjoy this immersive adventure.
Lost in Play Walkthrough Guide
Here is the Lost in Play Walkthrough Guide.
In the first chapter, players control Gal. They encounter various mysterious elements, such as a bear in the mirror and a floating cup. They solve puzzles, unlock doors, and experience a dream-like tea party before waking up in their bedroom.
The second chapter begins with Gal’s brother, Toto, waking up. Players help Toto solve puzzles, including fixing an alarm clock and scaring his brother with a mask. They navigate through different rooms and interact with objects to progress the story.
In this chapter, Toto explores the house further. Players distract a bear and solve puzzles involving frogs, a clock, and a sword. They must avoid the bear while maneuvering through caves until they finally escape.
Playing as Toto: The fourth chapter shifts the perspective to Toto. Players guide Toto through a forest, solving puzzles, and avoiding the horned bear. They retrieve glasses, navigate through puzzles involving frogs and a goblin, and finally escape the bear in a series of caves.
Toto frees a royal person and proceeds to solve puzzles involving magic circles and symbols. They collect ducklings, solve puzzles with gnomes, find useful items, and win a game against a goblin aeronaut. They ultimately catch the bear and enter a magical clearing.
Players alternate between Gal and Toto. They interact with various characters, solve puzzles involving pizza orders, collect ducklings, and solve a puzzle with a flag. They tickle a goblin aeronaut, swing from a heron, and finally arrive at a sailboat in the sea.
Players navigate the sea, encounter a whale, and alternate between Gal and Toto. They solve puzzles underwater, seal an outlet, awaken the whale, and solve logic puzzles. They receive the whale’s help, retrieve a fluffy process, and continue their journey home.
The content is a summary of the walkthrough for the game “Lost in Play.” In Chapter 8, the player controls Toto and Gal as they encounter a whale and a sleeping monster. They solve puzzles, retrieve items, and awaken the monster to obtain the fluffy process. In Chapter 9, they continue their journey home, facing obstacles, solving puzzles, and navigating through various environments.
They reach their destination and are celebrated for their safe return. Chapter 10 involves a flight on a dragon, while Chapter 11 focuses on rescuing their sister. Chapter 12 involves escaping from a prison cell, and Chapter 13 is about reading a story. Chapter 14 involves catching a frog, and Chapter 15 marks the return home.
Lost in Play Switch
Yes, Lost in Play is available on Nintendo Switch. Here are some of the features of the Lost in Play game.
-
Drawing inspiration from beloved nostalgic TV shows like Gravity Falls, Hilda, and Over the Garden Wall.
-
Engage in activities such as playing cards with goblins, constructing a dragon, and teaching a sheep to fly.
-
Offers over 30 unique puzzles and mini-games to challenge and entertain players.
-
Experience the amusing task of catching a delightfully derpy chicken.
Disclaimer: The above information is for general informational purposes only. All information on the Site is provided in good faith, however we make no representation or warranty of any kind, express or implied, regarding the accuracy, adequacy, validity, reliability, availability or completeness of any information on the Site.
Source: https://www.kidsland.edu.vn
Category: Entertainment